
25 DIY Christmas Decorations! Holiday Room Decor, Crafts & Projects made by Savannah and Stuff
December 19, 2016
Moving Stuff You don’t Need
April 22, 2018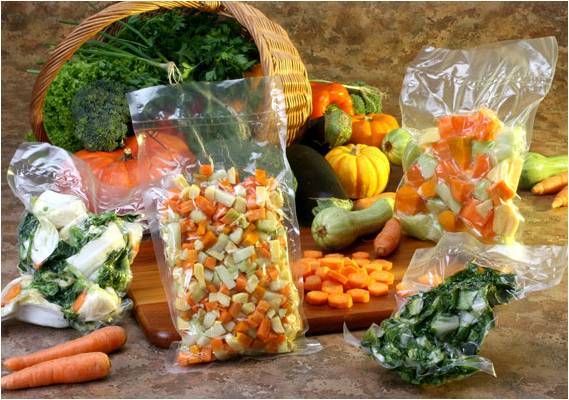
Tips from “Updater“
If you’re anything like most movers, packing up the kitchen will probably be the last and most challenging part of your move. First off, there’s the mystery canned meat in the back of the pantry, the expired food in the crisper drawer, and those protein shakes that are safe to eat but definitely a relic of your crazy diet circa 2001.
Before you throw in the towel and decide to pack or toss everything in your kitchen cupboards, use this checklist to decide what you should throw out, how to move the items you’re keeping, and what should be passed on for donation.
Target the near-expired foods.

Don’t waste valuable space on those refried beans that’ll only expire a month or two after you get to your new place. Go ahead and slide them over into the “to toss” pile.
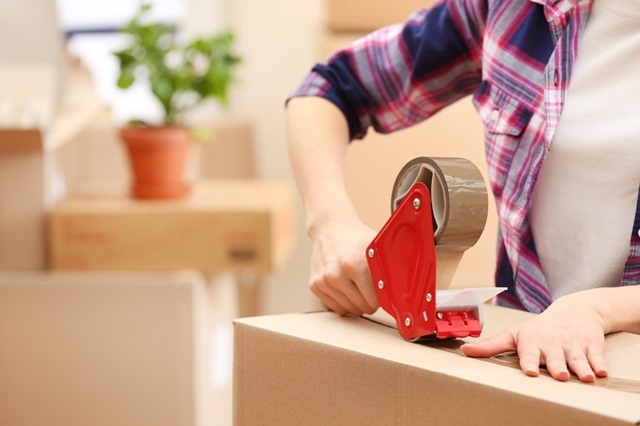
Tape up your fragile items.

Chances are, you’ll have an excess of the basics (things like flour and sugar), but you’ll need to place them in more secure packaging before you pack them up in the cardboard box. Stop by the local hardware or container store to purchase a few heavy-duty, sealable containers that won’t lead to some serious spillage. Otherwise, plan on placing items with tearable packaging into a ziplock bag.
Start cooking.

Especially if you have an extra freezer full of meats, start eating your frozen food stuffs early, and don’t replenish your frozen stock.
Cover your salt shakers.

If you have salt, pepper, or other spice shakers that you want to bring along, cover their sliding top with a piece of masking tape so nothing spills out en route.
Use reasonably-sized boxes.

As you begin to pack up all of the items that you’re planning to keep, think in terms of weight. If you’re saving a lot of canned goods, use small to medium-sized boxes so that lifting all your canned food doesn’t get too heavy.
Plan for your new space.

If you’re downsizing from extra cabinets, a huge pantry, and built in shelves to a kitchen without lots of storage room, prepare to pare down your collection of food by bulking up on foods that come in large packaging (tomato sauces or vinegars, to name a few).
Toss the glass bottles.
![]()
Even if they’re well packed, bottles of olive oil, spaghetti sauce, and bottled drinks are that much more liable to spill or burst open in transit. Save yourself a messy spaghetti sauce clean up, and try to use or donate your breakable items ahead of time.
Pack like a grocer.
Once you’ve decided what you’ll bring to your new home, pack all of your heavier items, like jars of peanut butter and canned pasta sauce, on the bottom of your moving boxes. Layer your lighter (and thus more fragile) items on the top, like your boxes of Oreos and crackers.
Label your dry and boxed items.
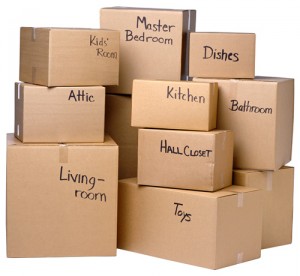
Once you’ve pared down your food inventory to things that you’ll be bringing to your new place, be sure to clearly label your food items in a “PERISHABLE” box. Try to segment your boxes into food type, segregating your “spices” box from your “canned goods” box. It’ll help ensure that you prioritize the perishables first and identify everything you need without opening all of your kitchen boxes.
Share the leftovers.

Regardless of whether you’re pitching an entire pantry’s worth of items or only have a few things to give away, you have a few outlets to make sure your expired food doesn’t make it to the garbage.
- Donate it.
- Ask your neighbor! Who knows, they may have a hankering for your leftover refried beans. Hey, it’s the neighborly thing to do.
Break out the cooler.

Chances are, you’ll be driving over the station wagon yourself with last minute essentials, like your emergency bag of clothing, your important documents, your laptop, and anything else you don’t want to hop aboard the moving truck. Add a cooler to the list, and bring any perishables that you want to save onto (like that expensive cut of meat Uncle Robert gave to you last Christmas). Just be sure to keep it in the passenger seat so you unload it first.
Pack your own alcohol collection.

The bad news here is that many movers will not move your alcohol collection, meaning that you’ll be responsible for safely packing and shipping your own bottles. Especially if you have an expensive collection of liquors, you’ll be responsible for securely packing and moving everything. Ask the local package store whether they have extra wine boxes on hand (perfect for moving your collection, since these boxes usually come equipped with handles). Be sure to stock up on bubble wrap, newspaper, and packing peanuts to help insulate the bottles in your move.
Check all the nooks and crannies.

Make sure to do a walkthrough of all the areas of your house where you store food. Did you check the freezer in the basement? What about the hall closet where you occasionally store the kid’s school snacks that don’t fit in the pantry?
Unplug the fridge. This one is a no-brainer, but you’d be surprised! If you’re bringing your fridge with you, make sure to unplug it at least 24 hours in advance of your move so the freezer has time to defrost.
Set aside something for breakfast. When moving-day finally rolls around, you’ll want to make sure that you’re well rested and well fed for the big day. Don’t forget to set aside a few granola bars and a few pre-made PB&J sandwiches to keep your energy high throughout the day. Trust us, you’ll need it!
Font: Updater